

I now have 4 in my greenhouse, they are pretty nice as they lift up to let the heat out all by themselves!!!

Hi Maria, we are so glad you are enjoying your auto roof vents! Thanks for shopping with us :D
Works better when you use two.... in N. Nevada, although not the hottest, I had to wrap the whole unit this summer.

This company is always willing to assist even when they have to go above and beyond because your request or concern doesn’t meet there protocol. Awesome customer service like this is what’s needed to be successful during a rough economy.

The greenhouse was a challenge for even me who considers myself a DYIer. I think the instructions would be better if wrote out in words instead of symbols but after all said and done my greenhouse looks great and have several compliments from my neighbors since installing on my foundation. I did not have a level place in my lawn so I had to build up a foundation to install my greenhouse. I had some bricks leftover from building my house and they came in handy for this project.

Thank you for sharing your experience Jack! We know installation can be challenging, but are glad to hear it was worth it in the end. Thank you for taking the time to write a review. Happy growing!
Great service, and fast delivery.

Jackie,
Thank you for leaving a review! We are so happy to know that everything went smoothly for your purchase and are always here if you need anything else in the future.
Happy Growing!
Due to rain, cold and wind we have been unable to setup the greenhouse. We will be happy to write a review when we are able to proceed with our project.
Hi Carol,
Thank you so much for leaving a review. We look forward to hearing how happy you are once everything gets set up! You chose a great greenhouse and we know you will be pleased with the outcome. Happy growing!
I would recommend grassroots company to anyone looking for a greenhouse, great customer service and fast shipping.

Hi Don! Thank you so much for taking the time to leave a review for us, this is so thoughtful of you. :)
We pride ourselves on providing high-quality products and excellent customer service, so it means a lot to us to hear that we've done just that. If you ever need anything else in the future, please don't hesitate to reach out. We value your business and hope to continue to meet your needs. Have a nice day!
First off I'd like to say grassroots Greenhouses was great ,,,the ecoflow unit isn't what I need,,,,it charges up fast with AC but I found out you can't leave solar panels plugged in all the time,,and that is what caused my decision to send it back,,,,,,so like I said Grassroots Greenhouses was great,,,, handled the return promptly,,,,, but ecoflow delta max wasn't for me,,,I give Grassroots Greenhouses a 5 but ecoflow I only give a 4,. Thanks. Kregg Holdaway

Hi Kregg! Thank you so much for the kind words. We're happy to have been able to serve you, despite the unit not living up to your expectations. We totally understand for these things can happen. We're just here to help you out in case you have questions or have interest in another unit in the future. All the best! :)
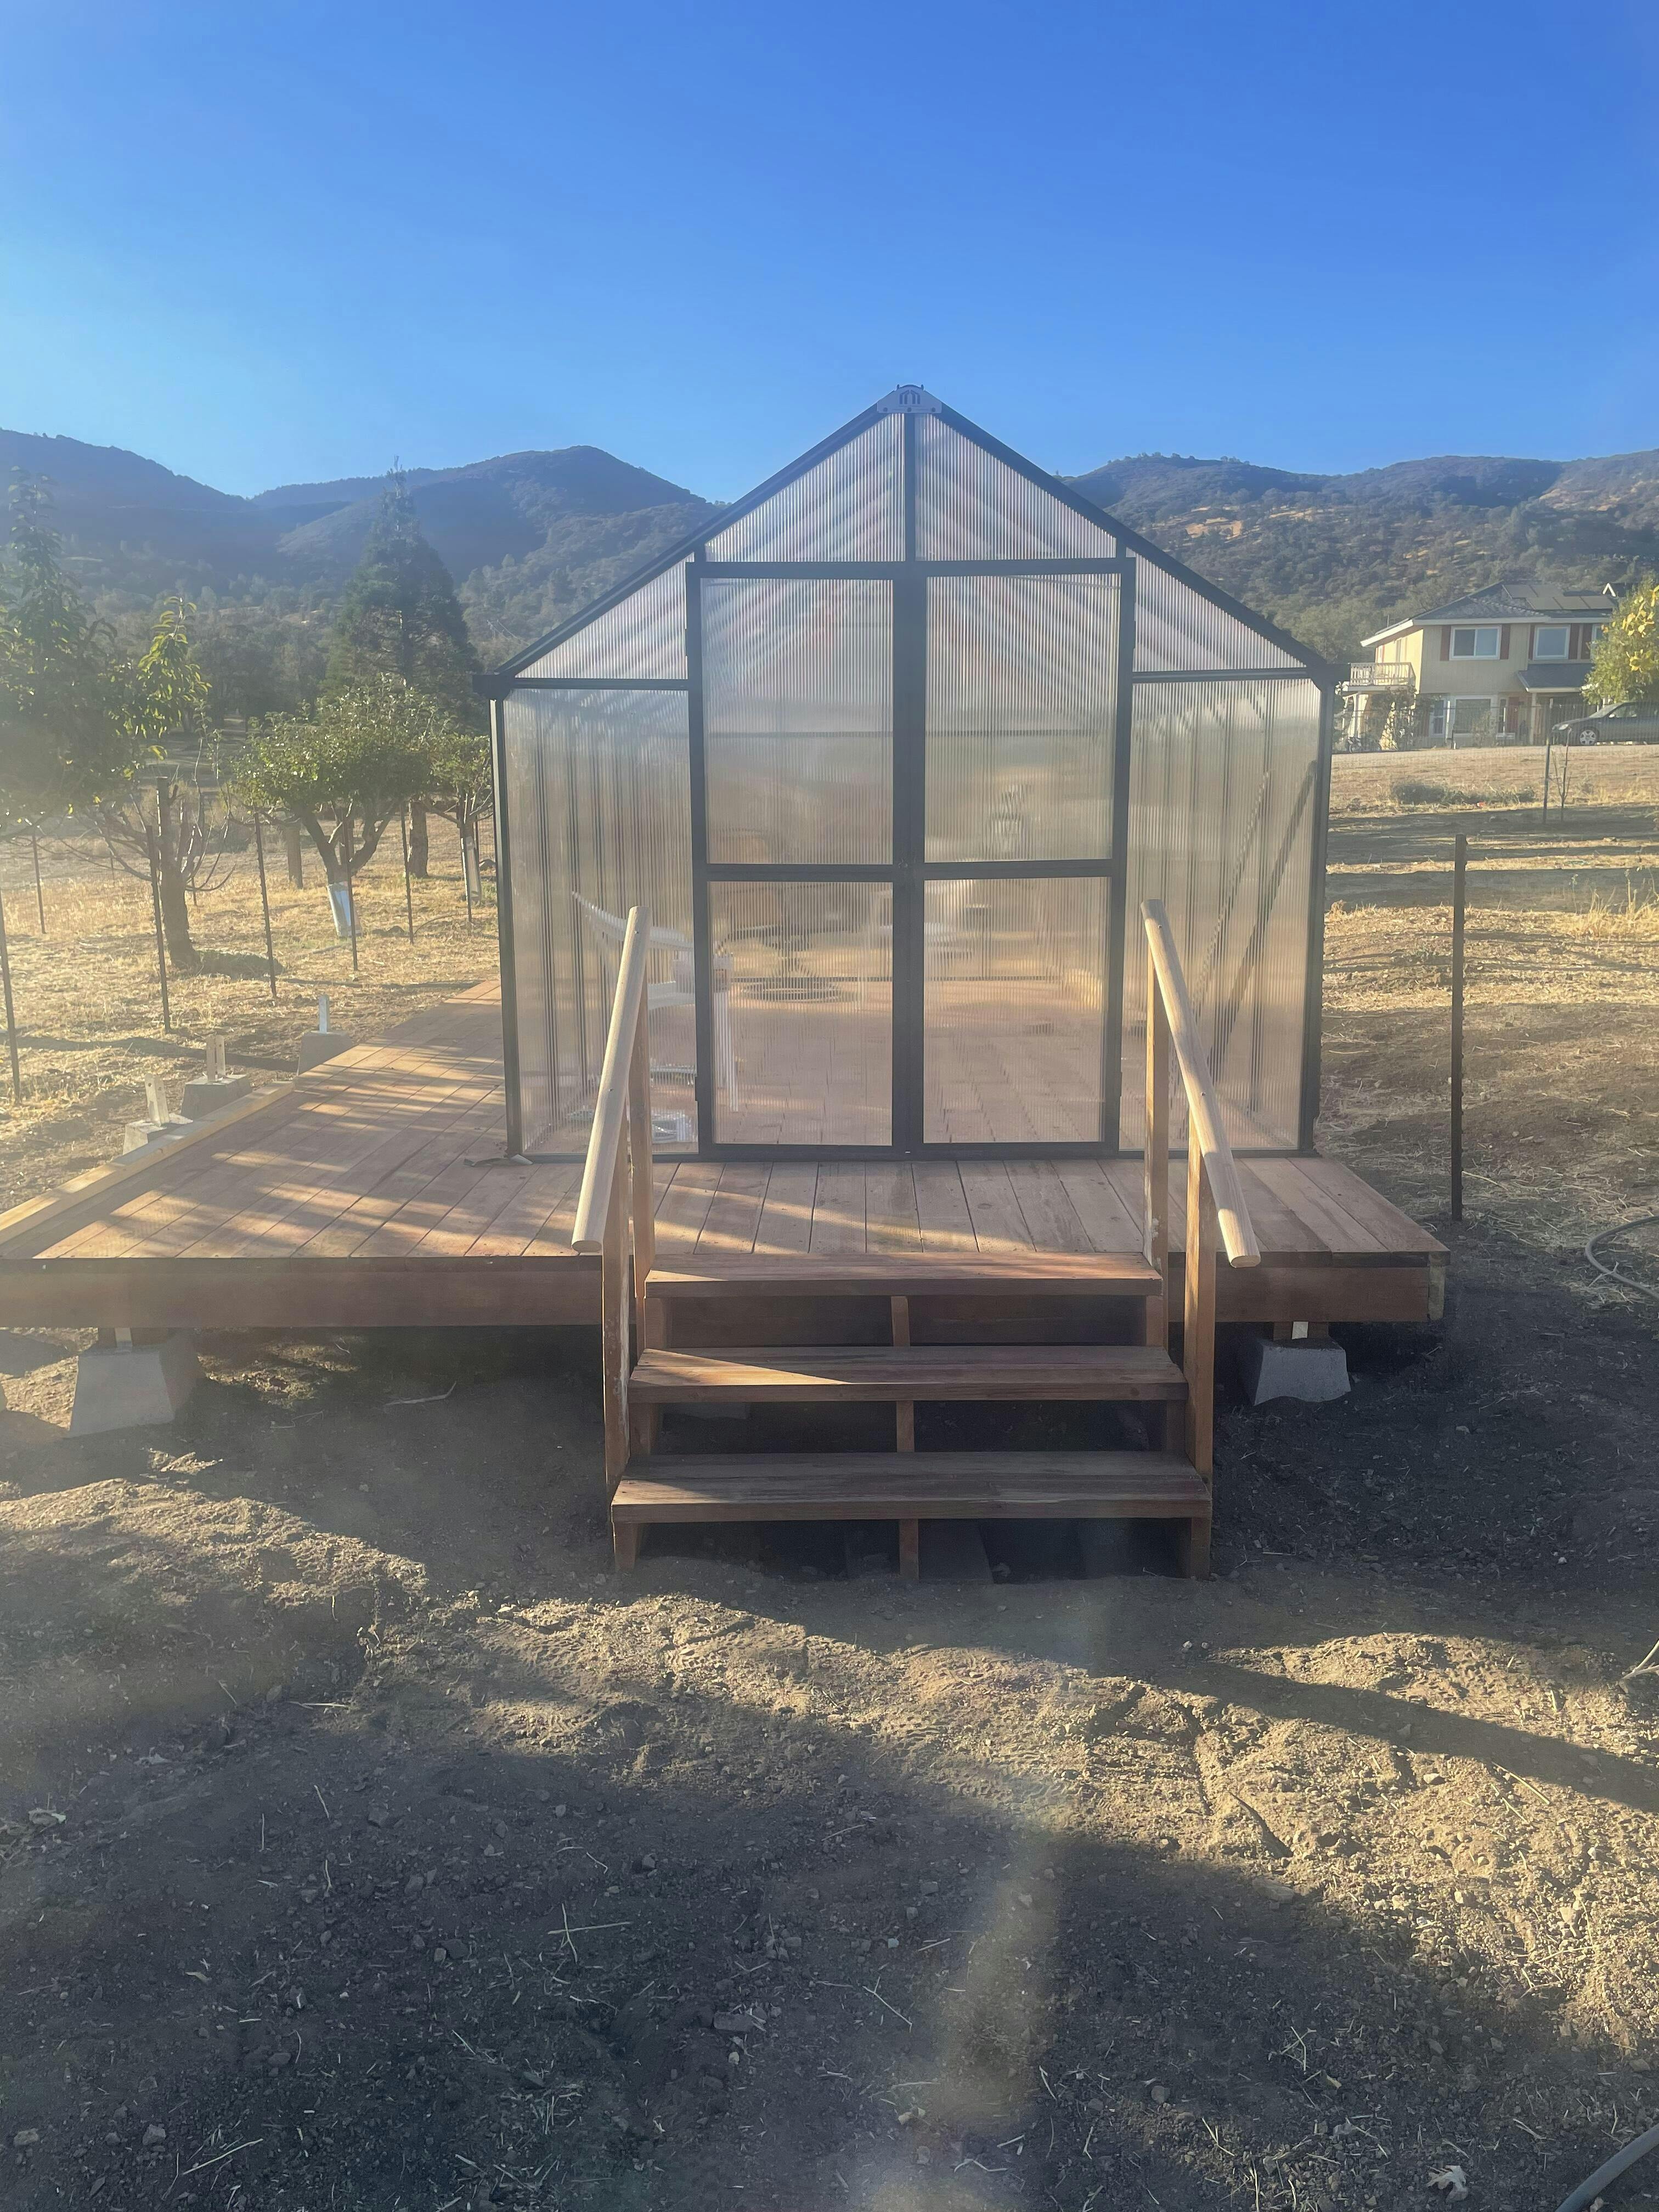
I wanted to add the photos of our greenhouse, we built the deck for the greenhouse and left some room for a couple of raised beds.

Unlike some reviews or videos I watched, I thought this greenhouse was well engineered. What I thought was lacking was good directions. There was next to no narrative. Each step has its own learning curve. As a consumer, we will probably only erect one greenhouse, so detail written instructions would have cut several hours off out installation time. But all in all, this is a very good greenhouse and my wife is very happy.
Hi William! Thank you so much for your thoughtful and detailed review! This is incredibly helpful to us. I wanted to let you know we've taken the good and the bad elements you've mentioned in your review to heart. Thank you again for taking the time to share your experience with us. :)
Step 10: I now removed the 6 screws holding the metal base to the 2x4’s and checked the alignment and level of all the walls. Once I was satisfied with my results, I then went around and install all the required screw for the base. Then I went inside and started installing all the structural brackets, making sure all fits and finished were properly aligned and closed (vertical structures meet horizontally structures) and tighten all down securely.
Step 11: install the vents. This was straight forward and went together without any problems.
Step 12: I then mounted the doors, which was easy because I made sure the structure as a whole was level and true.
Step 13: drilling the anchor screws into the ground. I started by installing all 10 of the anchor screw bracket, then I drove the anchor screws into the ground with my 1/2” dewalt cordless impact driver. Made short work of what is a daunting task.
Step 14: install the bench. This was straight forward without any problems.
Assemble was finished!!!!
End of day 2
To finish off my greenhouse I decided to get 10 yards of what was described to me a “large pea gravel” by the excavator. He said that small pea gravel would feel like sand under my feet all the time and that the larger (3/4”) pea gravel would give extra support. I agree now that is is inside the greenhouse.
I still have to install the electric and I places a 2” PVC pipe, trenched into the ground while I was building the base to accommodate this. I am bringing a 50 amp two phase sub-panel with 6 breakers for lights, outlets, heater and vent fan.
I am also bringing a water supply line to the greenhouse, but that will have to wait until spring.
Conclusion…
Except for a few hiccups from manufacturer’s errors, this greenhouse went up relatively easy and to be honest, it is of really good quality. I can’t fault the manufacturer for an employee’s mistake when they describe the spacer bar correctly in the manual, so I still gave it a 5 out of 5 because the greenhouse itself was manufactured correctly and went up as described in their manual. I have included lot of pictures to help anyone else in the future.
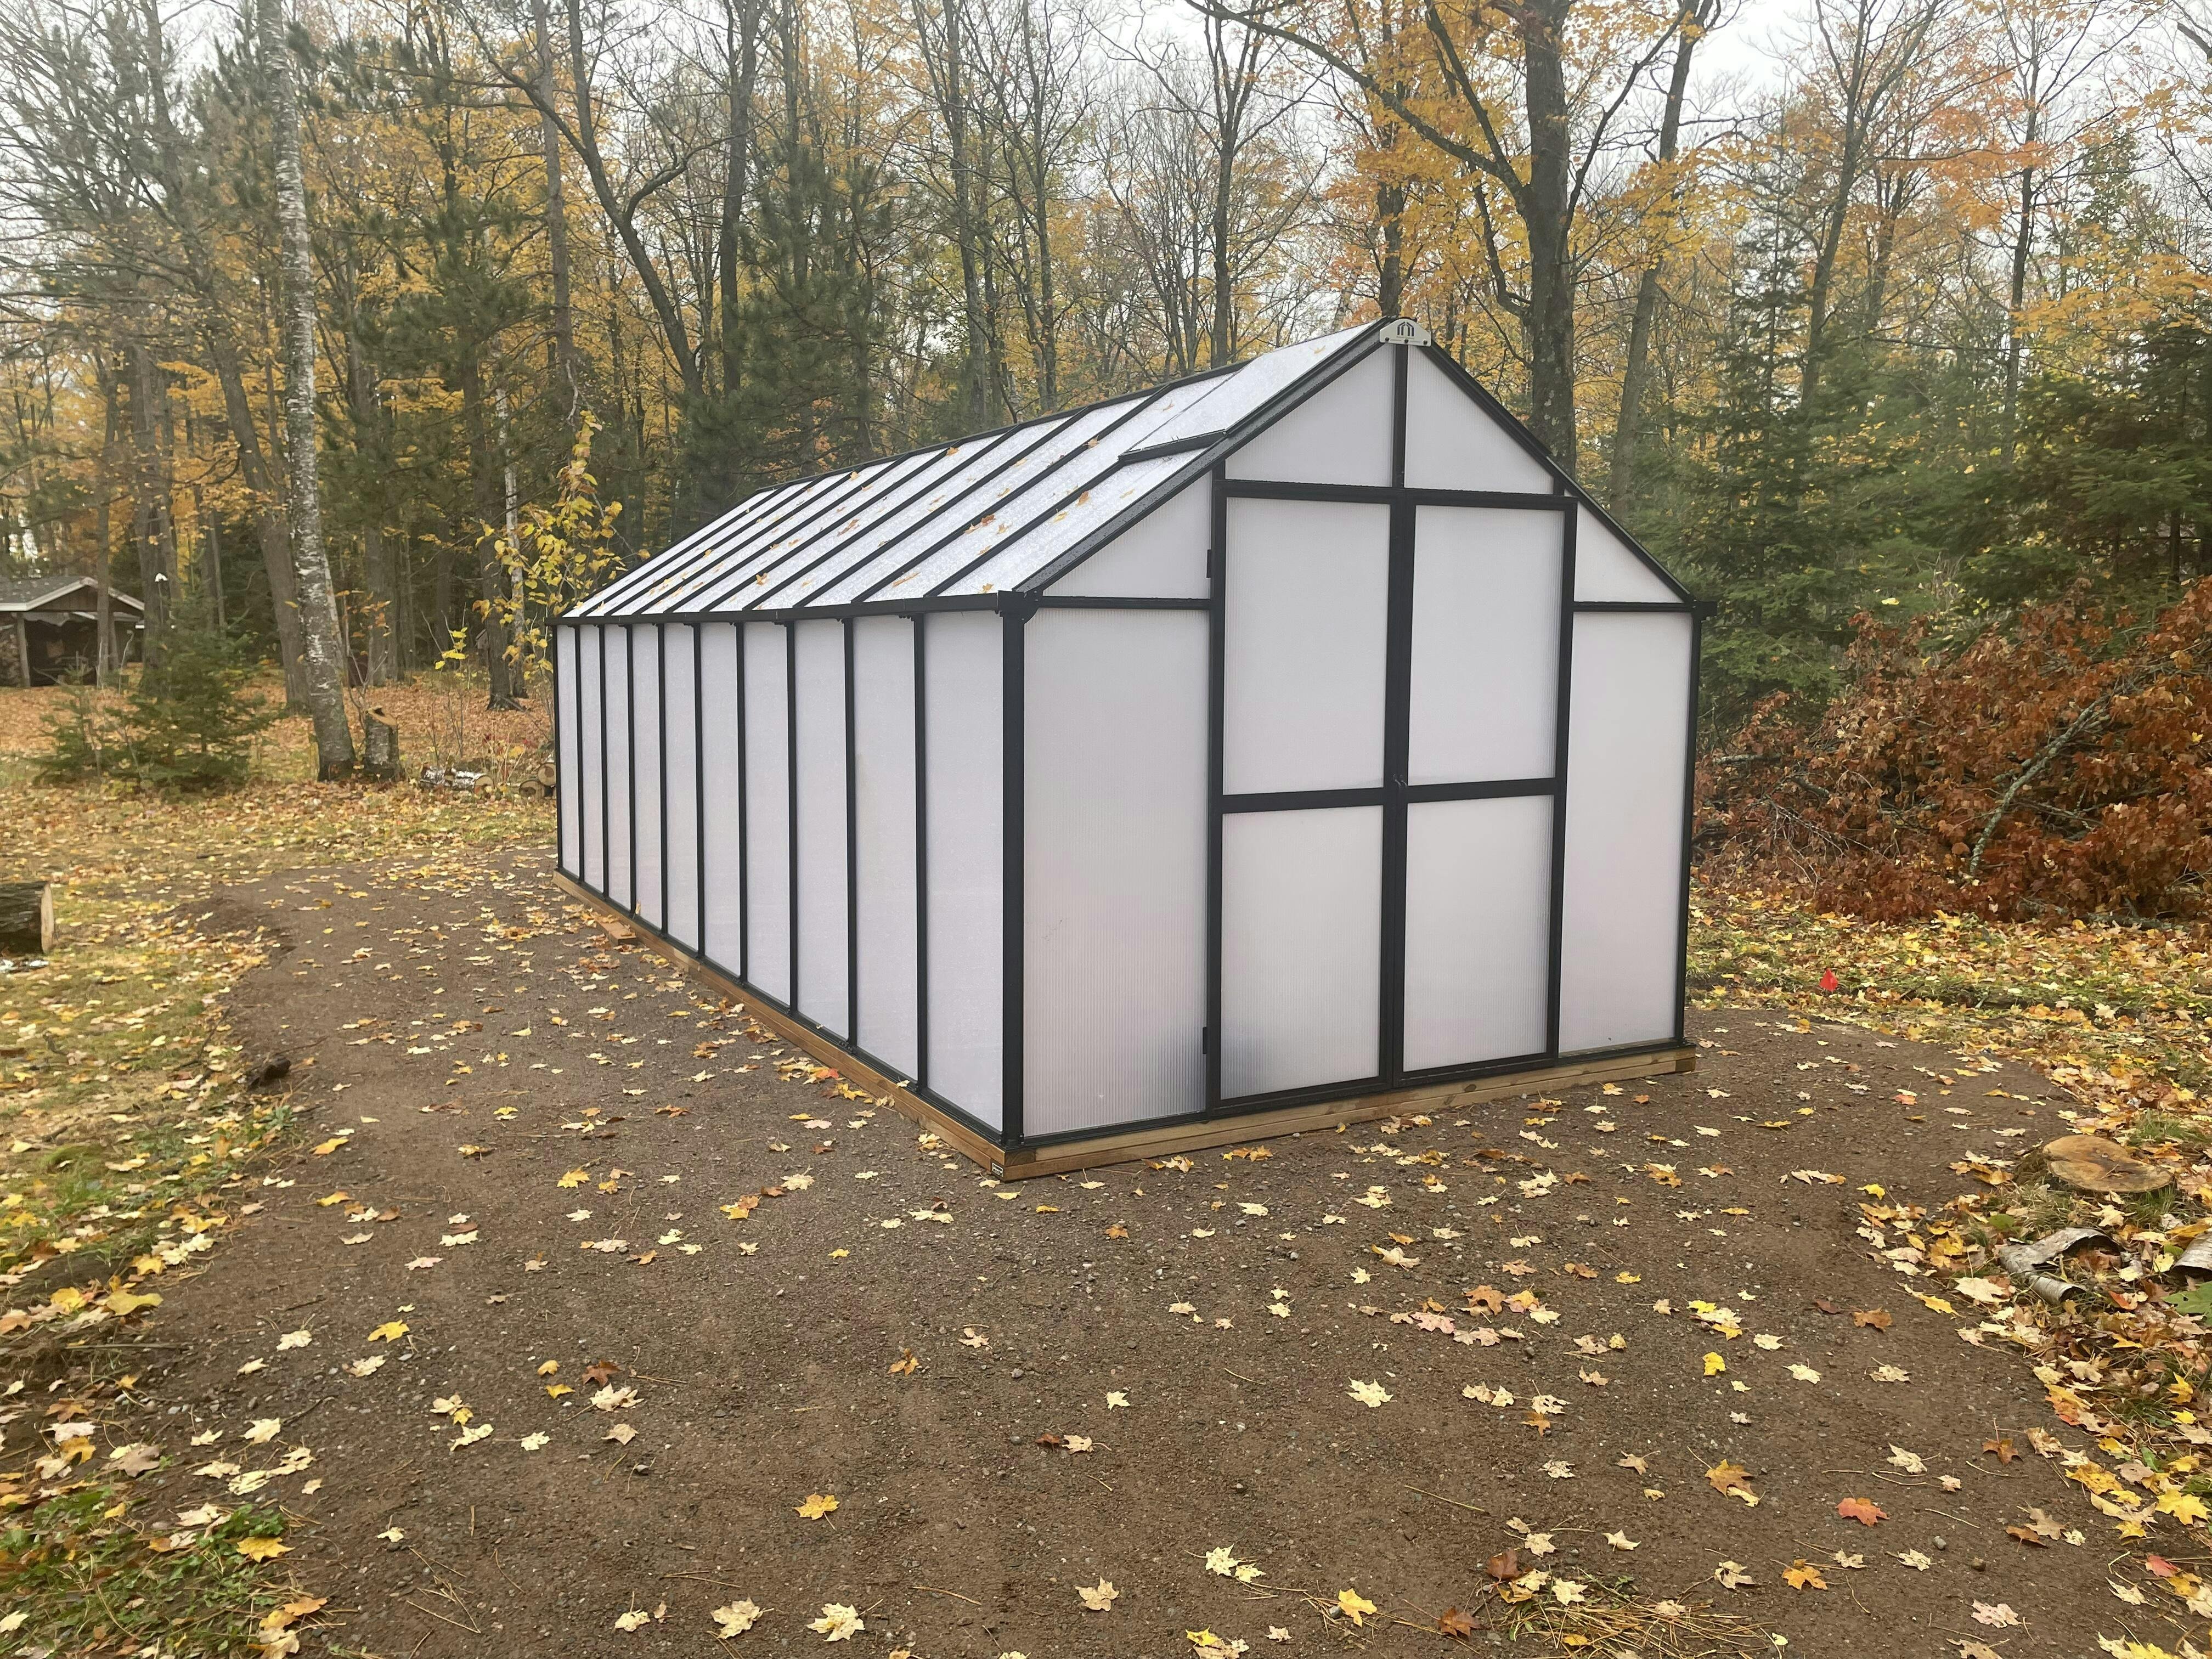
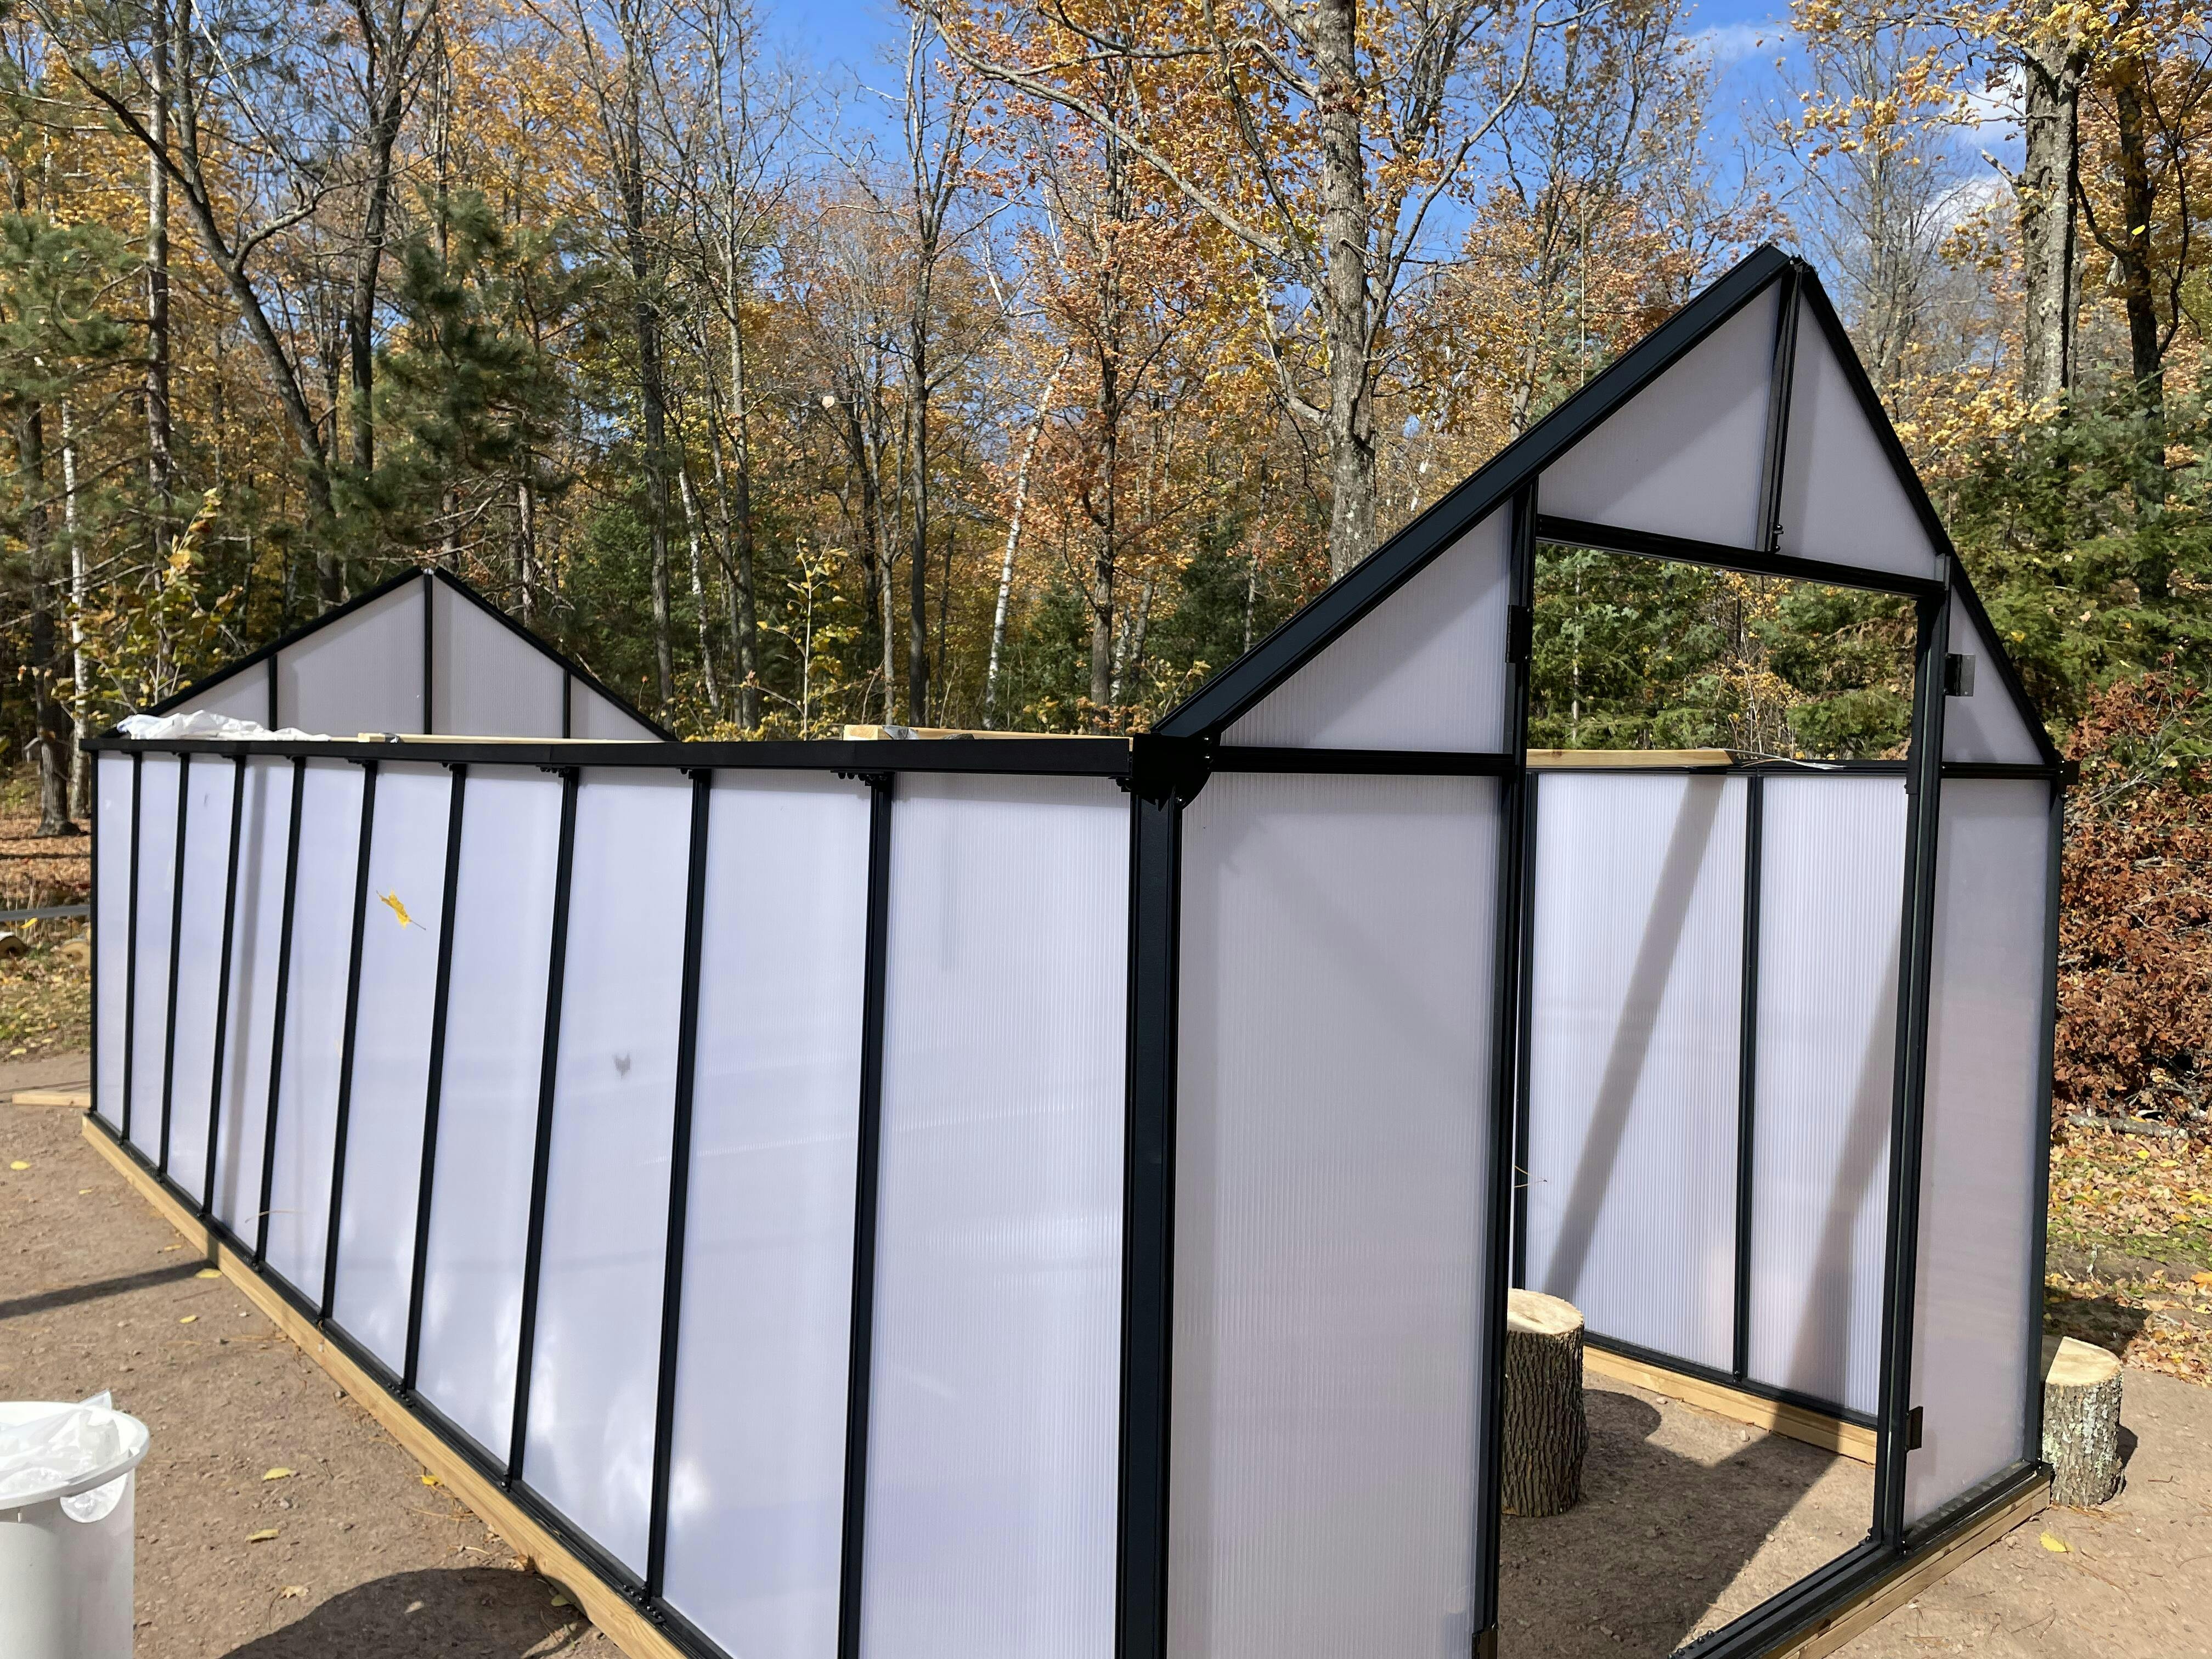

Our location is approx 40 miles south of Lake Superior in northern Wisconsin.
I’m am going to start with complaints and get them out of the way.
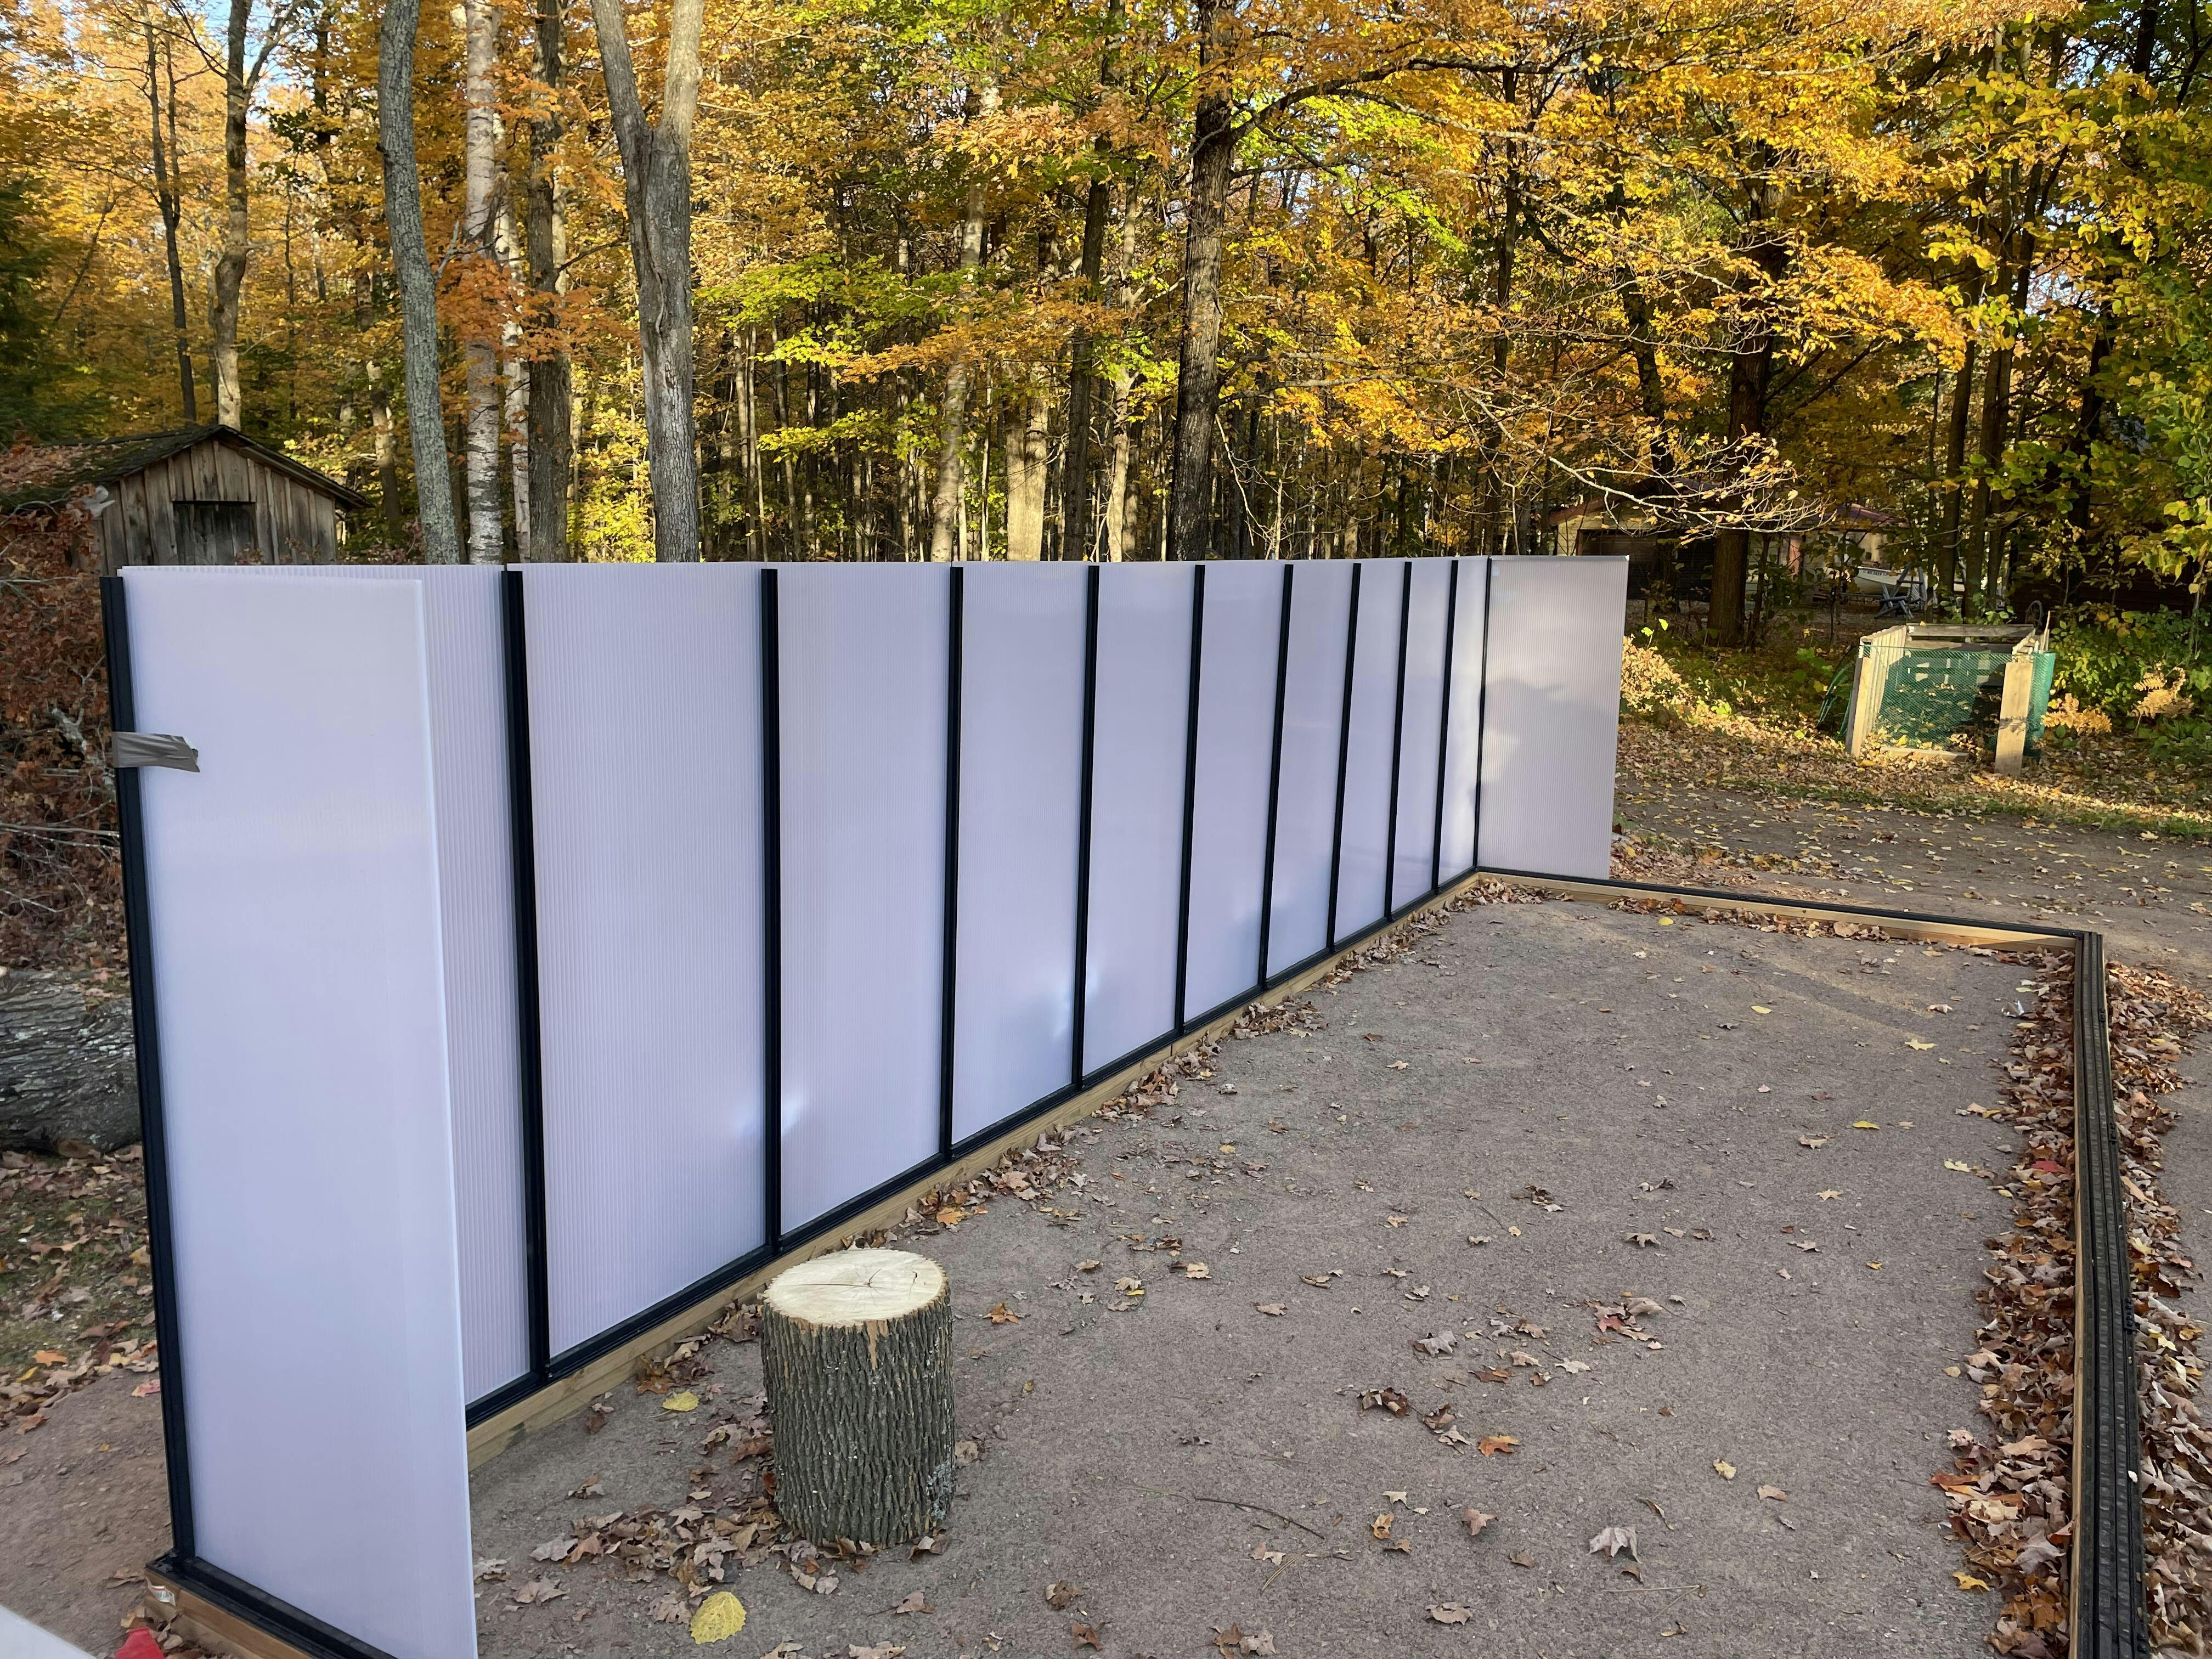
First complaint happened when assembling the first wall “right side”. We set the corner, placed the spacer between each vertical support and when we got to the next corner 20’ away, we were short by 1-1/4”. After review of our work, (checking each distance between the vertical supports, we came to and verified that the spacer rod was cut to exactly 23” instead of 23-1/8” as described in the manual. This required us to move all 9 of the vertical supports to accommodate the missing 1/8”. Now that we know this, everything went together much smoother.
Second complaint… couldn’t the manufacturer supply a couple of rolls of aluminum tape (buy 1” wide) to cover the tops and bottoms of every panel?
(We taped the top and bottom of every panel when we placed them during assembly)
Third complaint… couldn’t the manufacturer supply caulking for the gutters???
Fourth complaint… could the manufacturer please file all drilled holes? For what this greenhouse kit cost, they could at least clean the holes of drilling burrs. I know this may sound like a minor complaint, until you have to put one of those “T” bolt into a location where burrs are present.
With that said, and after working through these complaints, this kit went together surprisingly easy!!!
Tips…
If you can, have a cordless drill with a Phillips bit, a small cordless dewalt impact drill (inch lbs not foot lbs), with an extension and a 7/16 socket for the cap nuts, and large impact drill (foot lbs) with a 1” socket to drill the 10 screw-in anchors into the ground. Also have the screw drive and open/box wrench supplied, handy too.
Building the greenhouse:
My son and I are both engineers and after the site preparation, it took us two full eight hour days (even with the spacer bar problem), to complete the build.
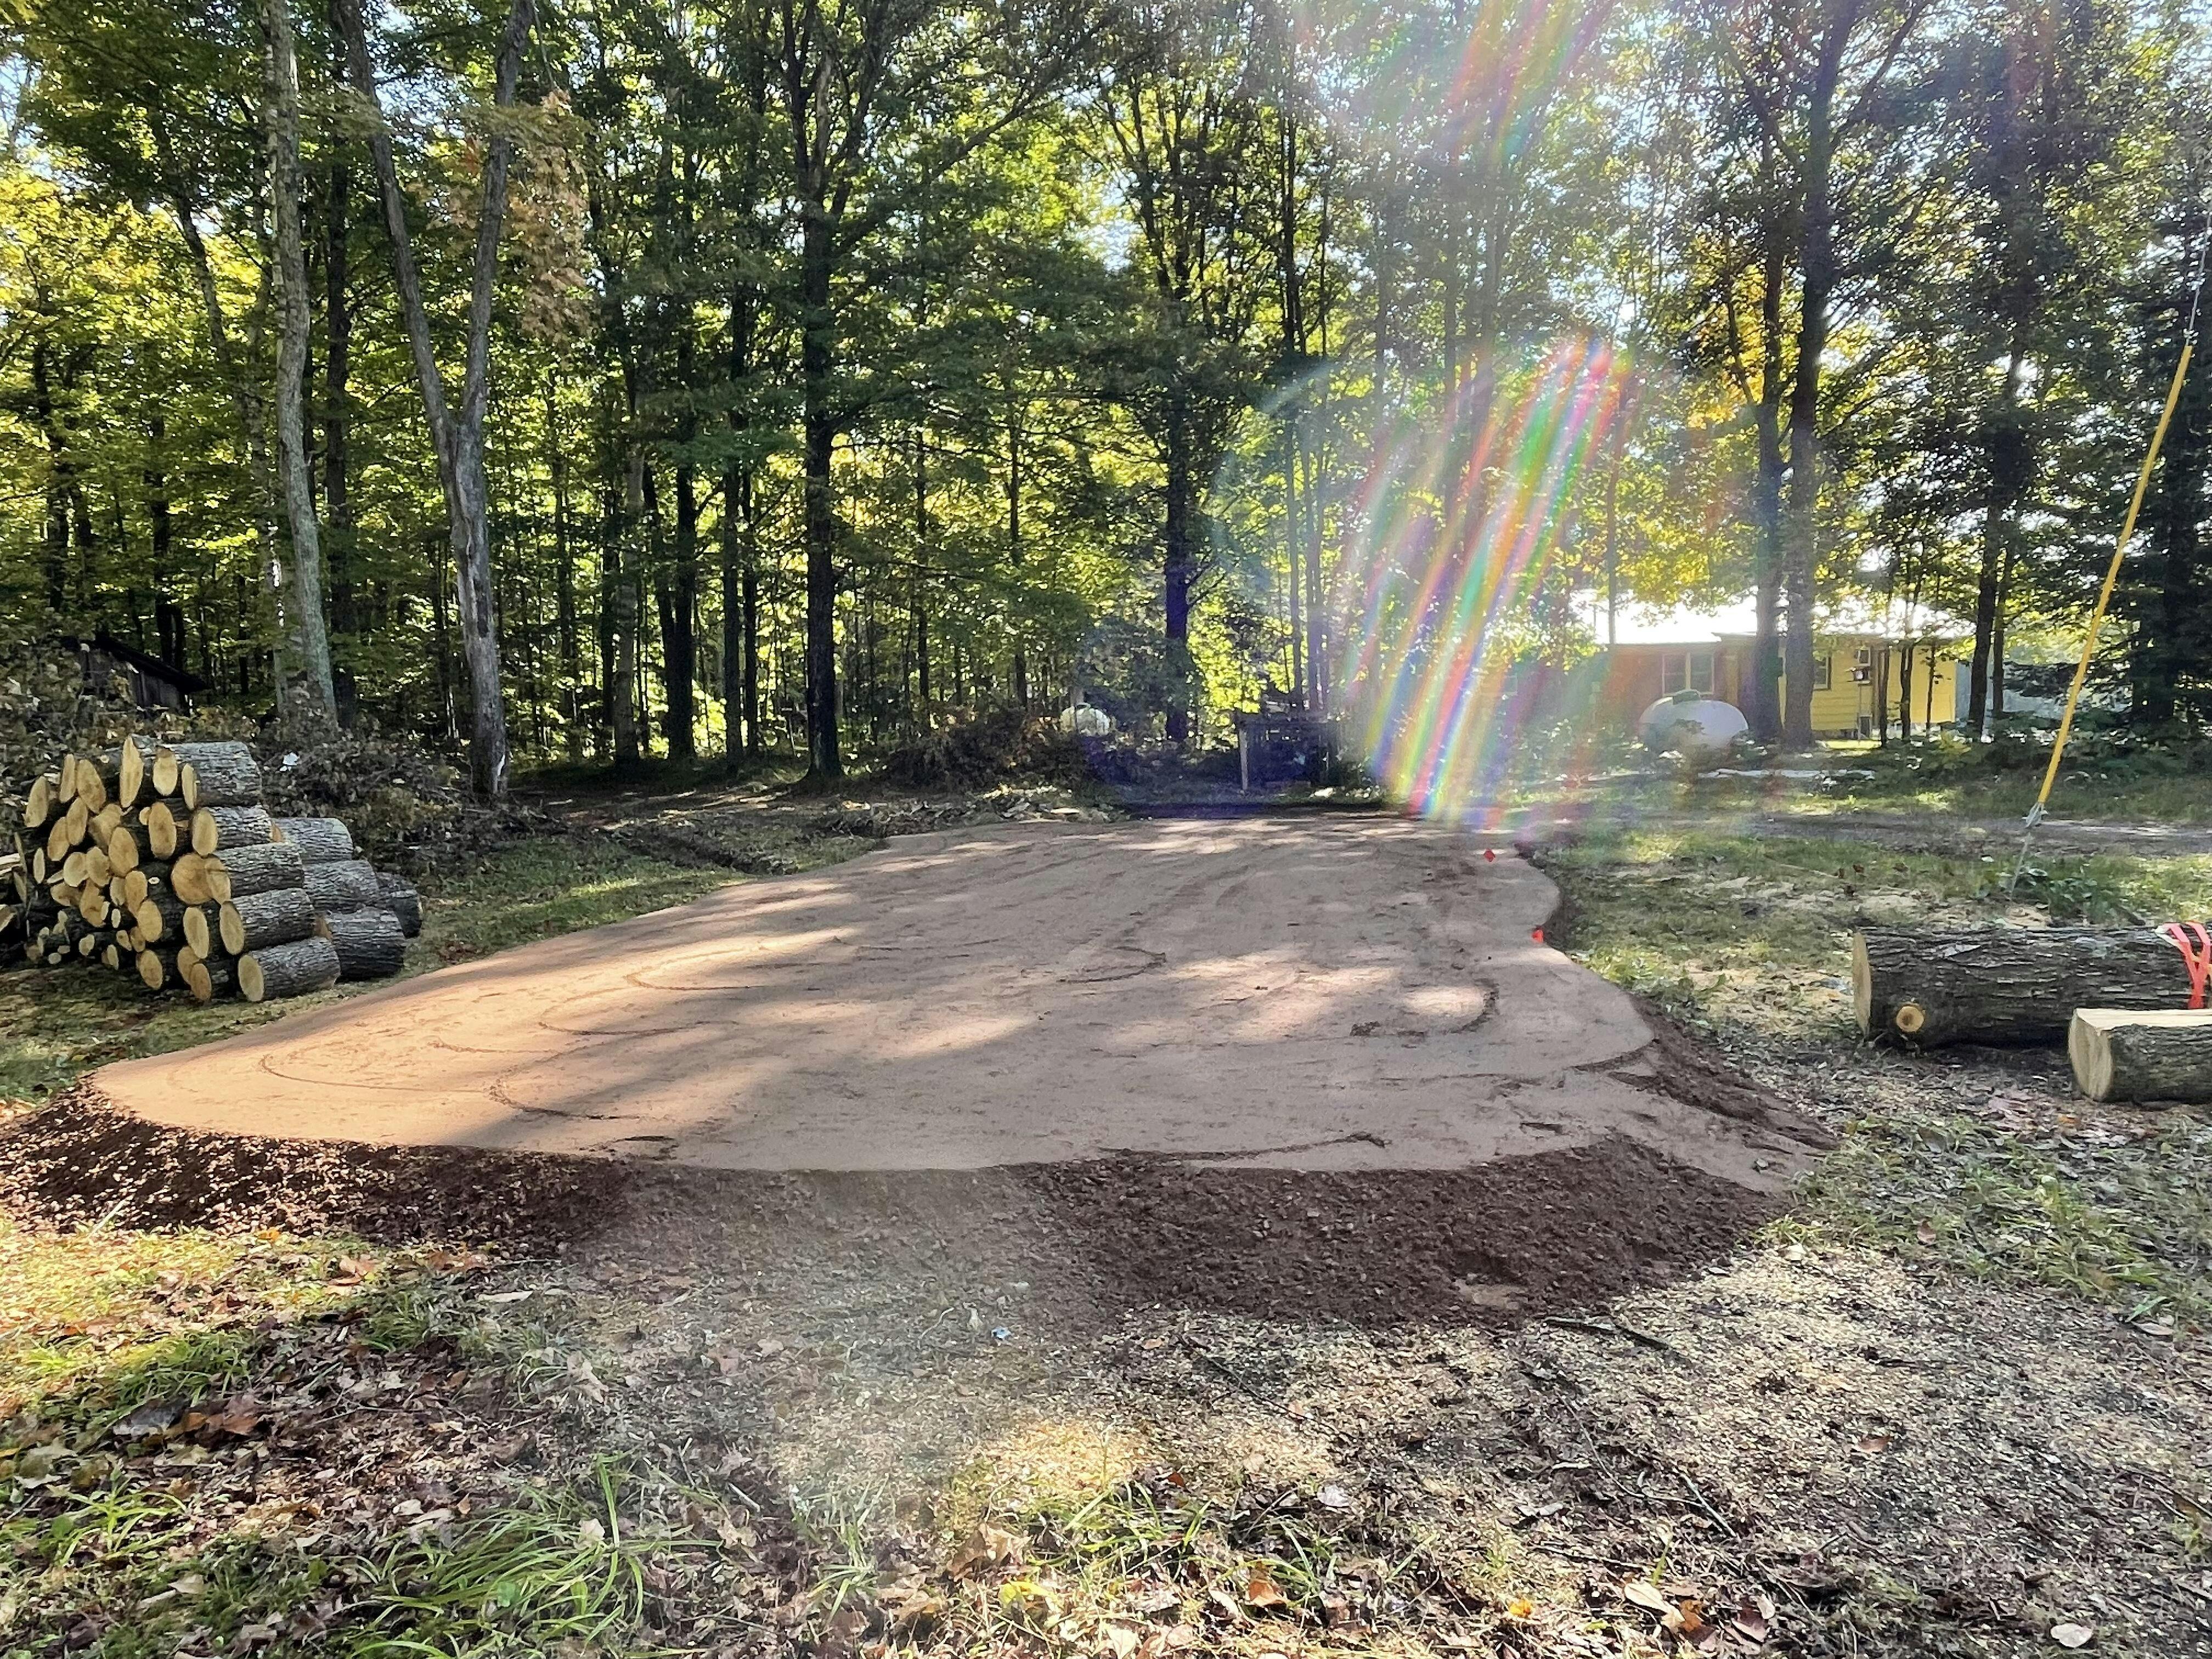
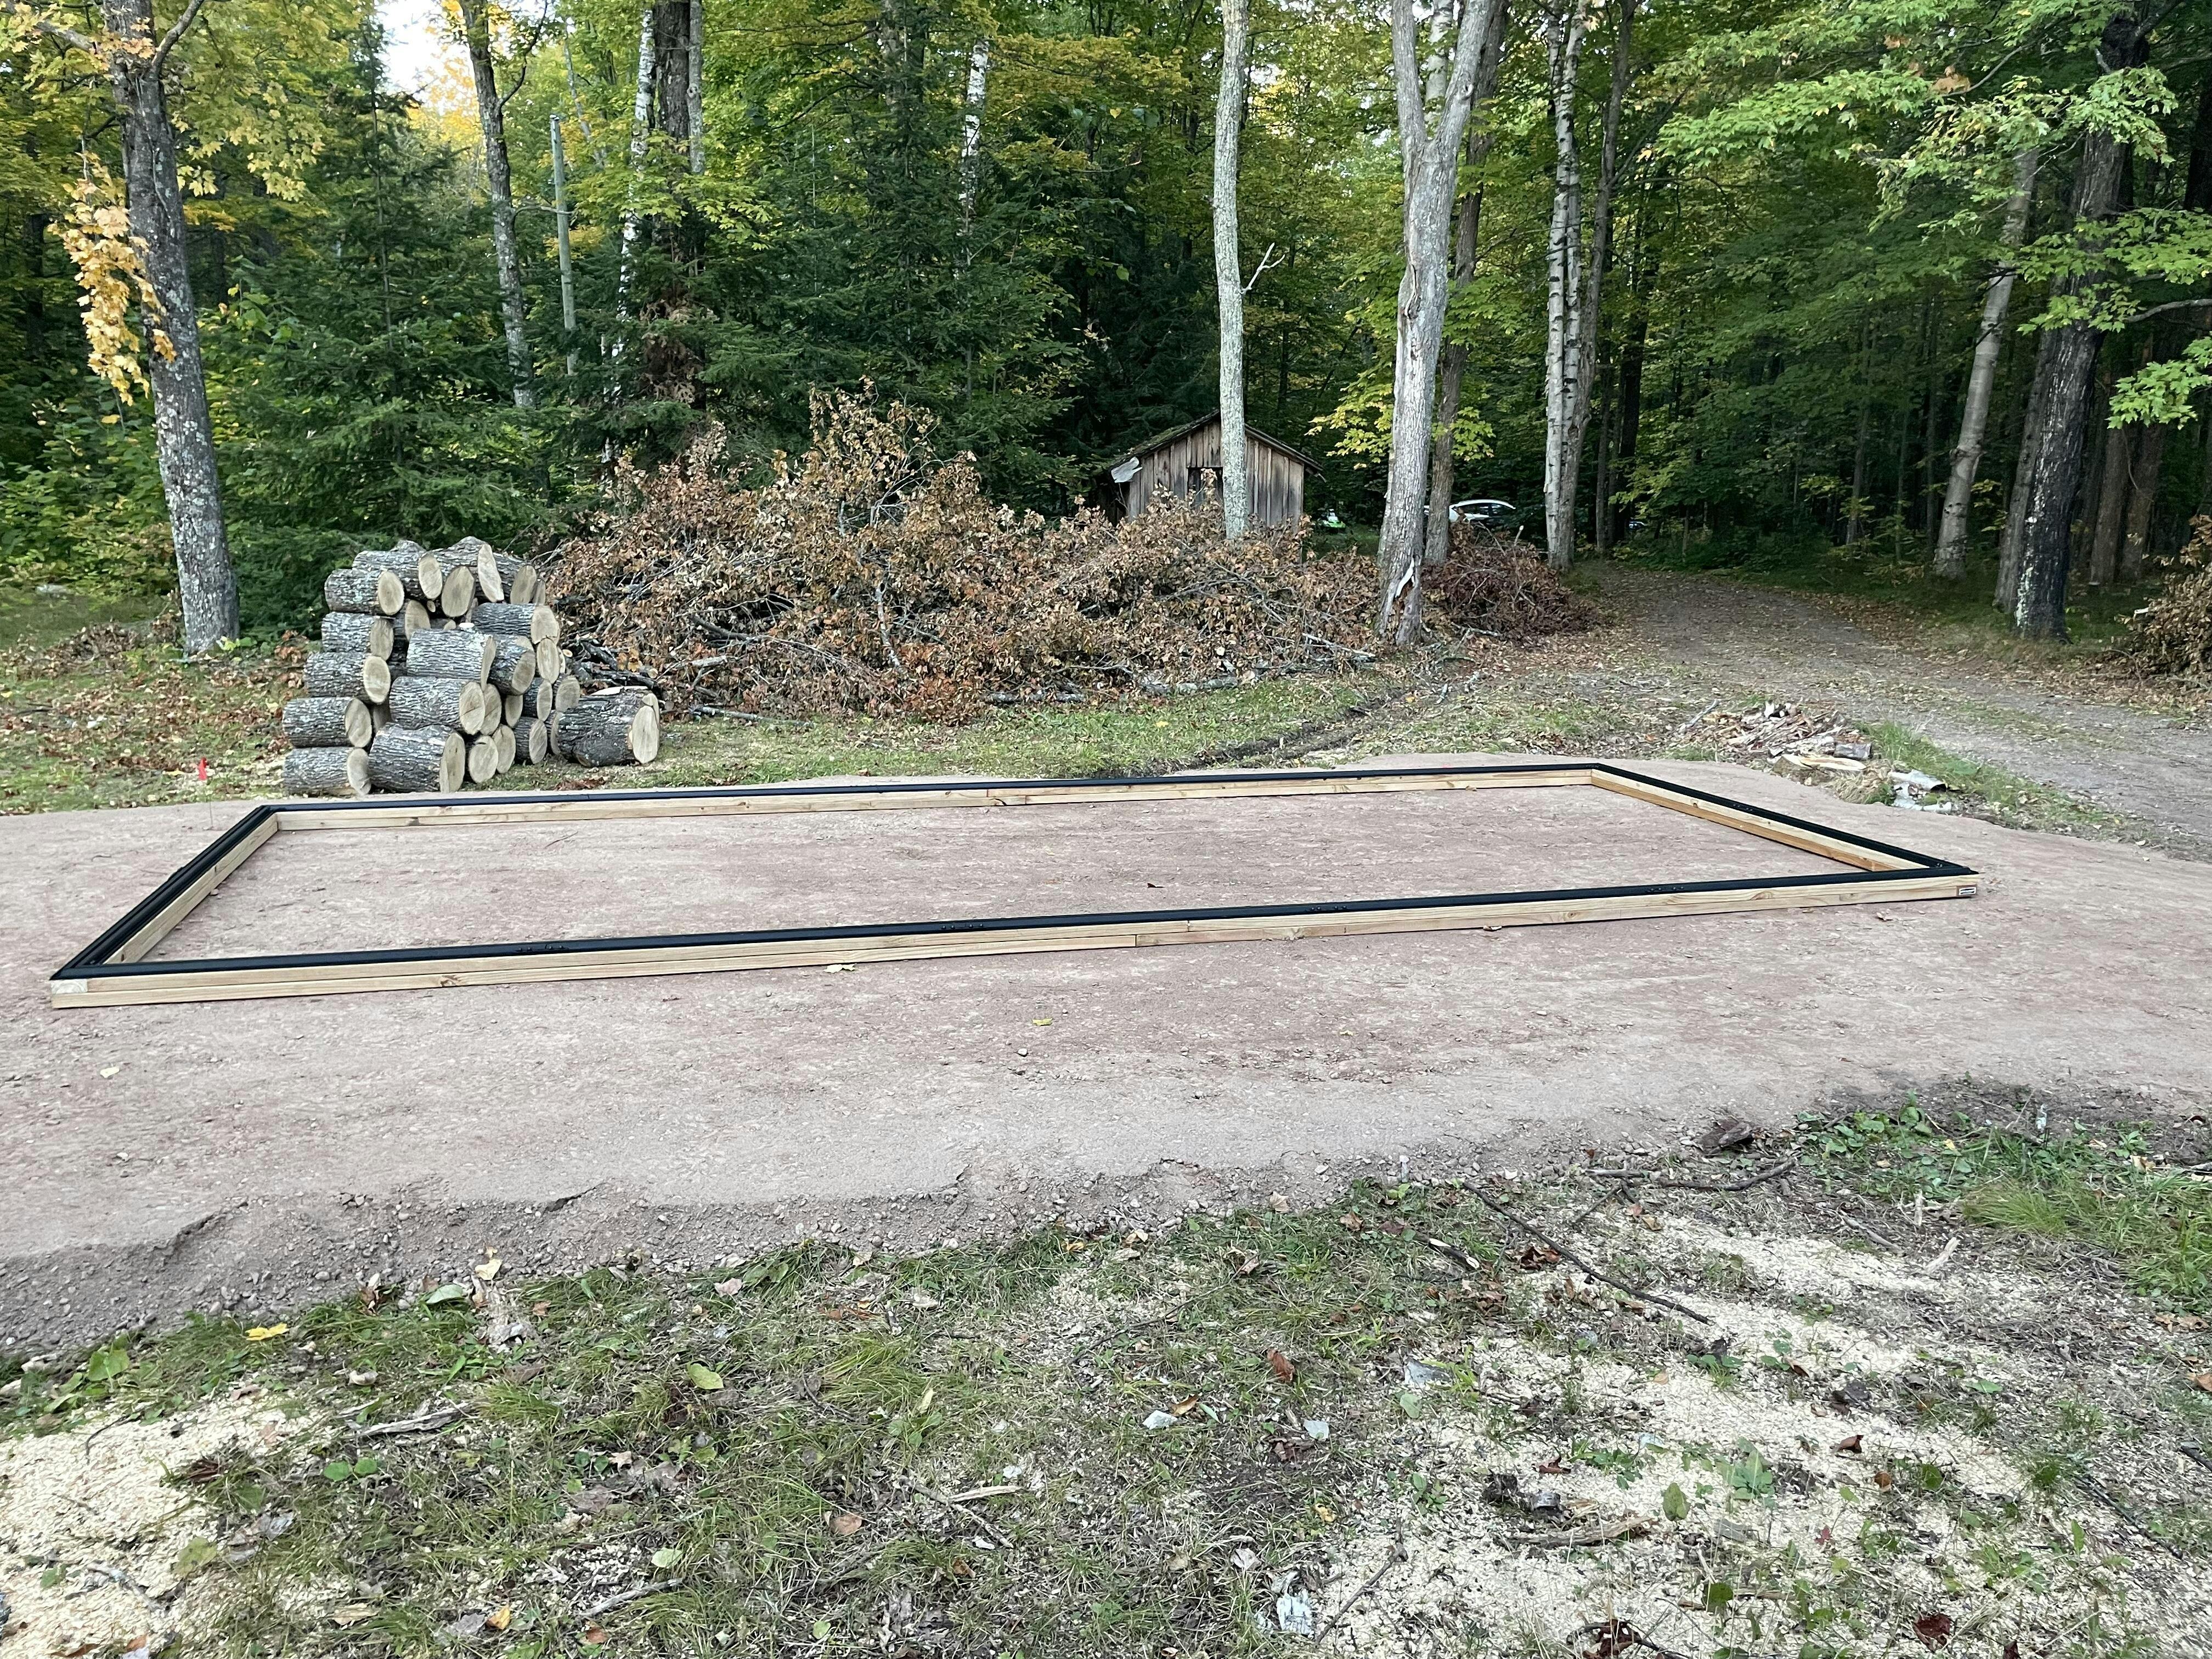
Step 1: I hired an excavator to deliver and level a 15’ x 25’ pad of compressible crushed rock for my starting base. This cost $900 and was worth every penny because it gave us a level platform from which to start and it made the build go smoothly.
Day 1
Step 2: I skipped the pre-builds and start first on the 2x4 base and made sure it was square from corner to corner. Put all the recommended screws to securely fasten it together. I then assemble the base on top of wood base, securing it with 6 screw, four corners and 1 in the middle of each long run. This will allow for movement while doing assembly.
Step 3: now I did the pre-builds and set them aside.
Step 4: assembled to right side wall and found myself short, but after the adjustment, all went well. When placing the pre-assembled gutter on the right side, here is a tip; align the centers of every other vertical support with the centers of the splices of the gutters, then go back with the spacer bar and align the vertical supports between the aligned supports. Much easier and more accurate.
Step 5: assemble the back wall. This went together relatively easy. Make sure you cut the poly as describe in the assembly instructions with a razor knife.
End of first day…probably could have finished the left wall if we didn’t encounter the spacer problem…
Day 2
Step 6: assemble the left side wall. This time (knowing about the missing 1/8”), the wall went up without a hassle. Again align every other vertical support with the gutter splices.
Step 7: assemble the front wall. This went up without a hassle except I needed to file all the drill hole to remove burrs…
Step 8: placing roof ridge. Make sure you have the required 2x4’s to support the roof ridge until you can secure it by assembling the roof.
Step 9: assembling the roof. Take 4 of the 45 degree angle brackets and drill out the center holes just slightly larger then they are, you will thank me when you use them on the roof assembly where the large roof ridge bolt passes through them.
If you follow what I am writing here for the roof assembly, it will make the job much easier by the end of this assembly. so that said…
Start by placing the two poly panels into the roof ridge and the back wall channel’s, then place the vertical supports on the open ends and loosely secure the supports with the (3) 45 degree angle bracket (top and 2 sides). Place the next two panels in place, then align the next two vertical supports to the gutter and roof ridge splices, centering on each. Lock these down by tightening the angle bracket. Now go back and use your spacer to align the previous vertical supports and lock them down too.
Continue this pattern until the roof is complete. Following the splices in the roof ridge and gutter assemblies will insure proper roof spacing.
See part 2
Hi John! Thank you for taking the time to write a thoughtful and detailed review. This is going to be helpful for our customers! We always love hearing personal experiences and we’re always looking for areas for improvement. Again, we appreciate you! We're here for anything else you might need.
Premium kit design requires some construction expertise to execute. Ingeniously designed except for doors which seem to be an afterthought. Doors should be set into frame with flange for proper attachment and sheltering of weather strip. Lock system should be more central and reachable on door. Should consider the option of right or left opening access of double door. Open springs for door closer are dangerous and inconvenient. Plexiglass panels and vent system work to provide an ideal environment for greenhouse plants. System is physically strong and plumb. The shelf system is versatile and well designed.
Our winter winds here in the Bitterroot Valley of Montana will be the true stability test. We will be building a fence to help mitigate the force of those winds from the north. For the price, it should have a better door system. The construction instructions should be reviewed by neophyte consumers. Near the end of the manual, drawings and instructions are less clear, ie. door, hinges, lock, and insulation strips

Hi Alice! Thank you so much for your thoughtful and detailed review! This is incredibly helpful to us. I wanted to let you know we've taken the good and the bad elements you've mentioned in your review to heart. Thank you again for taking the time to share your experience with us. :)
I loved the Ecoflow Delta Max 2000 so much, I bought another one to have one on each floor.

Solar charging is great with two panels! All Charged in a few hours because in AZ we have lots of sun to make this fabulous! Lots of plug-in ports with an easy-to-read use panel. The weight is a bit too much for me, so I am putting it on a cart with wheels so it's more manageable. I would like to have built-in wheels. I just didn't realize how mobility would be helpful. We had a test opportunity almost a week after purchase with a neighborhood black out. Very happy with the performance in a black-out environment! The black-out experience has given us an idea how nice it would be to have another con
The DP really is excellent for Vanlife. I'm using it connected to a 760W solar array on the roof and a additional 500W inverter to charge via the cars alternator. The option to charge with solar and AC therefore is just ideal. As I'm using a normal AC fridge and the idle draw of the inverter is quite high i added a small inverter to the Anderson port to reduce losses. This setup is perfect for me with my inductive cooking plate!

I started with the Ecoflow Delta Pro, and after seeing the quality and the real use case scenarios, I decided to get another with the Extended Batteries as well as the Smart Home Panel. With the 22KW I can now run my fridge, freezer, lights, outlets, microwave, mini split AC unit and more for about 6 days in case of an outage! In addition adding solar panels will help top off the batteries if needed and the Ecoflow gas generator is also ready to be used if needed. Completely love everything about this system, easy to set up and works like a tank! Thank you Ecoflow!
After owning an EcoFlow R600 Pro when looking for a larger capacity watt hour power station and larger inverter my husband & I looked at all options available and selected the EcoFlow Delta Pro. Living in Florida we get lots of hurricanes and this power station was purchased to handle the power outages that happen. We've done a test run for a few days and we're all set when the power inevitably goes out next time. At the moment we're deciding whether to add on an extra battery to handle a longer outage. We've already purchased one EcoFlow 400W foldable solar panel and we're considering a second one as well. Living in a condo a solar generator fits the bill as gas & propane aren't allowed onsite here. Great product. Performs exactly as desired.
Preppers would love this unit. I purchased this to charge via my roof solar panels should the power go out for an extended period. I hope to get some more portable panels in the near future. I'm confident this until will meet my power needs in an extended grid down scenario. Things like a refrigerator, lights and maybe even the microwave. Thanks for such a great product. Tried to get a smaller unit 2 years ago from another company via indiegogo...disaster. Still waiting, and may never actually see the product and even if I do, I'm not sure I'll have confidence it won't burn my house down.
This battery power station does exactly as described. Our block had a power failure and thank goodness we had this little brute on hand. 1 day turned into a 2 day outage. We hooked up the fish pond and small refrigerator to it, just plugged them in and it performed perfectly. I noticed we might need a longer time frame as our power company was replacing 2 underground transformers in front out our house. Well...as luck would have it our Neighbor was able to recharge our power station PDQ. The quick charge mode on this baby we were fully back in 'ON' mode in 2 hrs. Here we are again, with a notice of a full power outage for 8 hours, we're ready! I am now going to include an extra power pack, and maybe even the solar attachment. THANK YOU DELTA Max!
I use a gas generator in the morning to charge my Ecoflow River Plus. Then when the sun hits my solar panel it will keep up with most of my power needs until late afternoon when I need gas generator again. Solar panel not aimed directly at sun but I still get up to 77 watts input mid day

400 watt folding panel, noon, cloud free day in Florida, angle set to be perpendicular to sun, max power generation according to the app, was 260 watts. two consecutive days. Panel gets very flexible in the heat, if even minor cracking occurs efficiency will drop.

Shortly after I purchased the Eco Max hurricane Ian's affects came through and we were without power for a few days and the Max helped greatly with keeping our freezers and refrigerators plus smaller appliances running. Easy to use and great product.
Doing a camping trip as I type this. The Ecoflow delta max powered my cpap and camp refrigerator all night long. It took less than 2 hours to fully recharge. I really enjoyed the extra comfort I get knowing I have reliable power. My wife now wants me to purchase a solar panel to ensure sustainable power.